


Hi everyone! In this first article, i'll explain in a practical way how to use Nodemailer for you projects 🚀
Introduction
Sending emails is a common requirement when it comes to create nice proyects. Some common cases to integrate the sending of emails are:
- User registration (when the user needs to confirm their account)
- Reminders (depending of the app, for example a reminder of new discount offers)
- Results of an operation (for example, statistics)
- When you account was banned 🙃
A great tool for doing this in Nodejs is Nodemailer. In this article you'll learn how to use it and append a simple text, images, or docs for your projects 🤖
Creating an Express app in NodeJS
For the case of showing nodemailer, i'll use an Express app to create an endpoint that will create the email and send to the destination. But you can adapt the code depending of your necessity. So first, after installing nodemailer and express , initialize a basic express app like this in your index.js:
const express = require("express");
const PORT = process.env.PORT || 4000;

const app = express();

app.get("/", (req, res) => {
    console.log("Welcome to Nodemailer test!")
})

app.get("/send", (req, res) => {
    // TODO: Send an email with dummy data.
})

app.listen(4000, () => {
  console.log("Server running 🚀 in port " + PORT);
});
In your package.json, you can change the script and add this to refresh the app on save:
  "scripts": {
    "dev": "nodemon index.js"
  },
Create app password for Gmail
Now, before jumping to the actual code for sending the email, first we need to create a "app password" in our gmail account. This is needed because the emails that we will send come from a gmail account, and we need a form of "allow permission" to do this. Go to "Manage my account" in your google account, and then:
- Click on "Security" (in the sidebar at the left).
- Search "Sign in to Google" card, and enter in "Passwords of applications".
- Select Application > "Another" (name it like you want).
- Save the password generated for your app. We need this to configure the sender in the code later.
Sending email with simple text
First, we need to create a transporter and configure it with Google. In the user, set your gmail and in the pass, the string generated for your account in the previous step.
Tip: Im just generating this transporter inside this endpoint, if you need to use it multiple times, is better to have it in a separated file and exported.
app.get("/send", (req, res) => {
    let transporter = nodemailer.createTransport({
      host: "smtp.gmail.com",
      port: 465,
      secure: true, // true for 465, false for other ports
      auth: {
        user: "joacofracchia@gmail.com", // generated ethereal user
        pass: "passwordGeneratedInPreviosStep", // generated ethereal password
      },
    });
})
Right after configuring the transporter object, we are ready to send our first email!
await transporter.sendMail({
      from: '"Shiny Code ✨" <joacofracchia@gmail.com>', // sender address
      to: "anothermail@gmail.com, anothermailtoo@gmail.com", // list of receivers
      subject: "Hello ✔", // Subject line
      text: "Hello world?", // plain text body
      html: "<b>Hello world?</b>", // html body
    });

return res.status(200).send("Email sended")
For test this, in this particular case, send a request to "localhost:4000/" with GET method
And thats all! Now you can create a script to fill your's friend inbox with spam 😁 (Just a joke, dont try it).
The email that we sended, just contains plain text. But with nodemailer, you can also send html, files, calendar events... you can try those too. For example, this is how you can send text + image.
Sending email with Text and an Image
First, place your image in a folder in your app. Something like /assets/image-test.png (it can be a gif too if you want)
Then, add the image as an attachment for your email:
await transporter.sendMail({
from: '"Shiny Code ✨" <joacofracchia@gmail.com>', // sender address
to: "tesorobbw@gmail.com, anothermailtoo@gmail.com", // list of receivers
subject: "Hello ✔", // Subject line
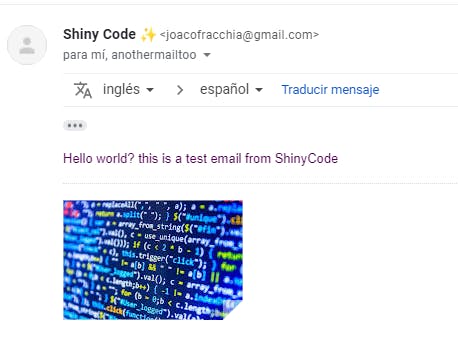
text: "Hello world? this is a test email from ShinyCode", // plain text body
attachments: [
{
filename: "Coding image ✔.jpg",
path: __dirname + "/assets/coding-img.jpg",
cid: "idOfImageUnique", // should be as unique as possible
},
],
});
return res.status(200).send("Email sended")
The result looks like this in your inbox:
Conclusion
And that's all! You can attach many things in one email, remind that it also accepts html so you can create a nice template for your emails.
If you want to continue experimenting with this nodejs library, here is the documentation